LectureTube Recording
Prerequisite
To make a recording, you need a confirmed lecture hall booking in TISS for the respective LectureTube hall. The recording starts and stops automatically. In the lecture hall, you only need to switch on the lecture hall equipment (beamer, microphone, camera settings).
Guide in TISS
To make a recording, you need a confirmed lecture hall booking in TISS for the respective LectureTube hall. The recording starts and stops automatically. In the lecture hall, you only need to switch on the lecture hall equipment (beamer, microphone, camera settings).
Navigate in TISS to "Course Administration" (1a) and click in your course on the tab "E-Learning" (1b). In the section "LectureTube" you can plan new recording dates (1c).
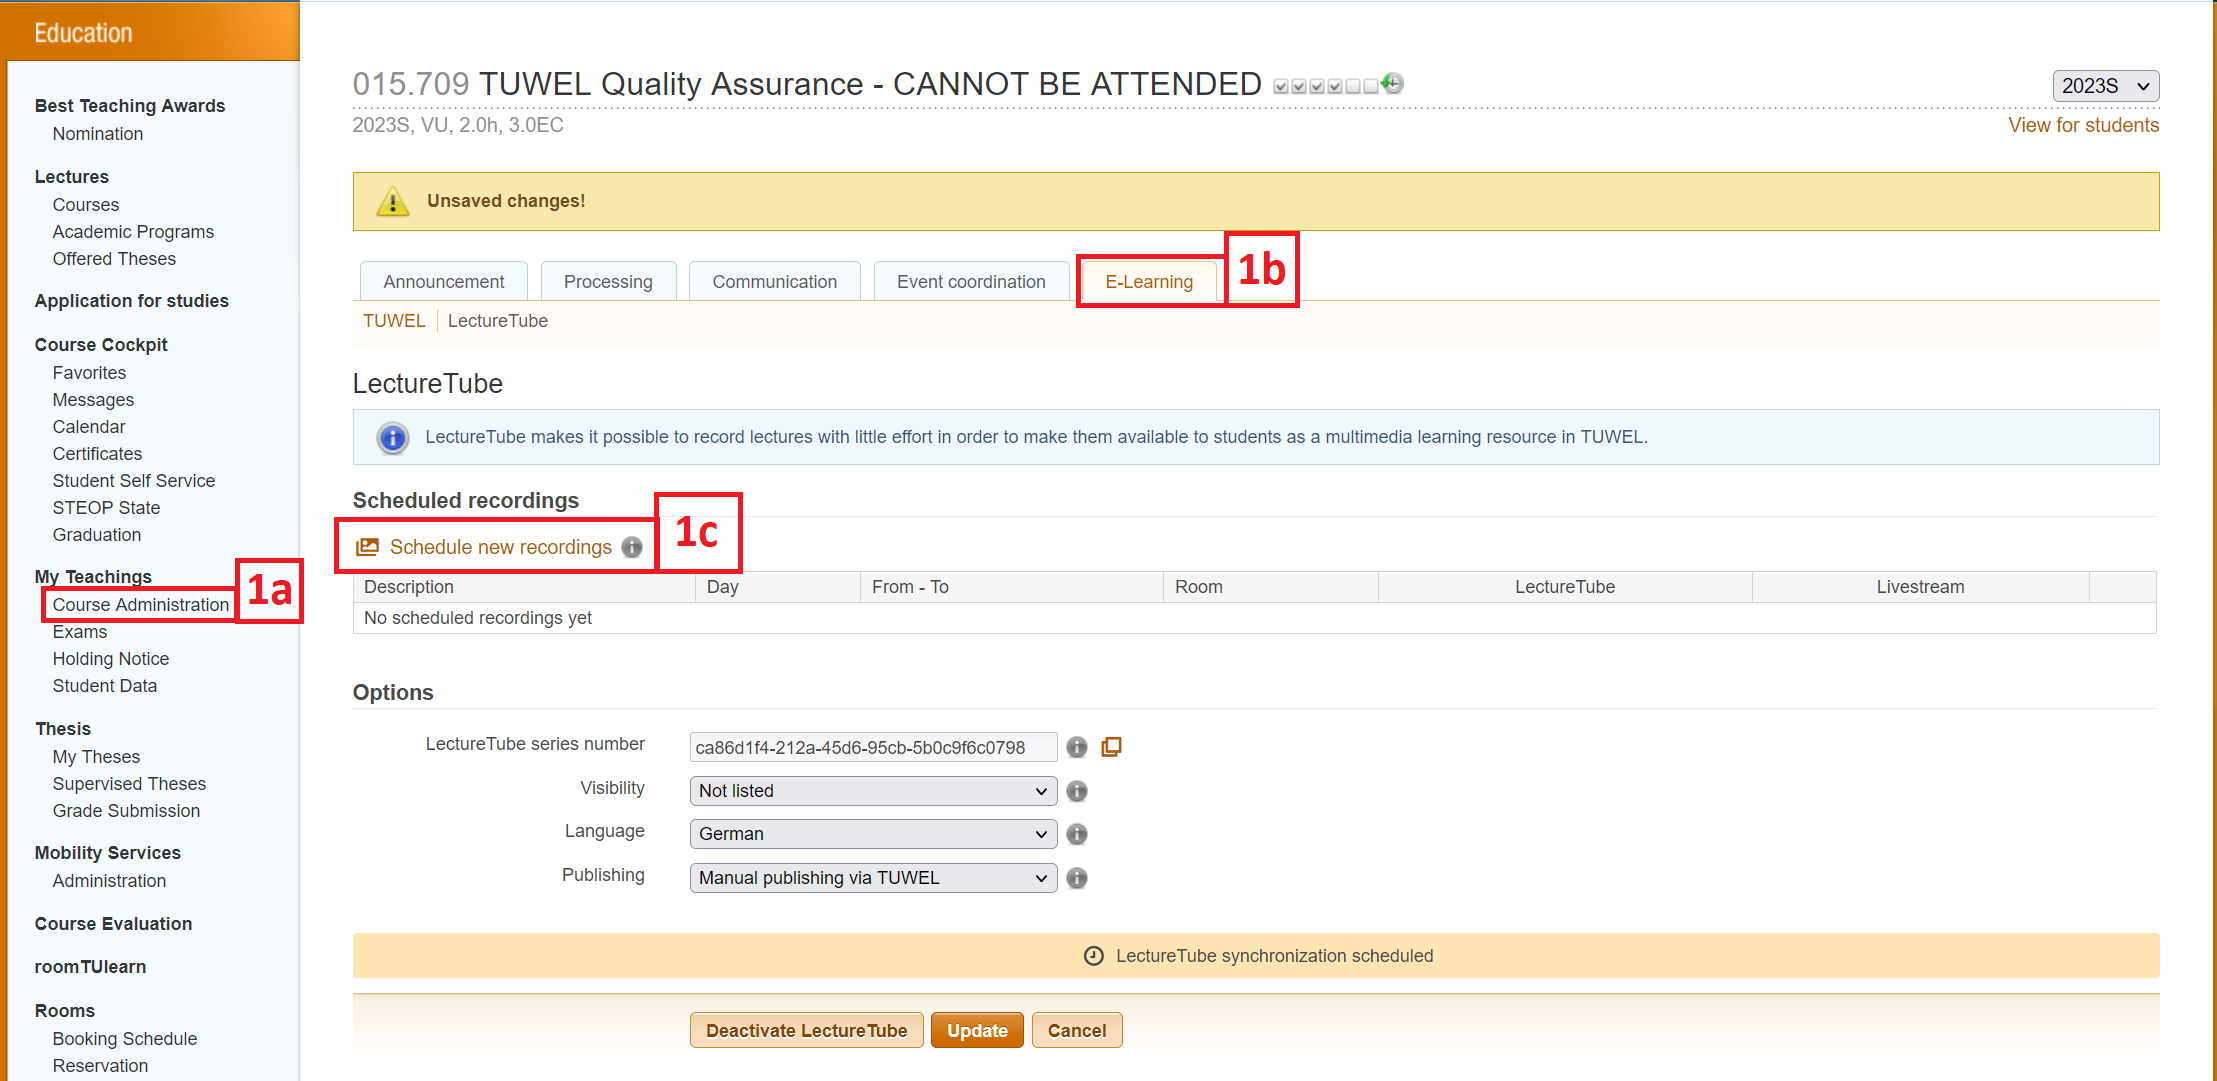
Figure 1: TISS – Plan a new LectureTube recording
Then select the confirmed recording dates ![]() (Figure 2 - 2a) and add them to the recordings list (Figure 2 - 2b).
(Figure 2 - 2a) and add them to the recordings list (Figure 2 - 2b).
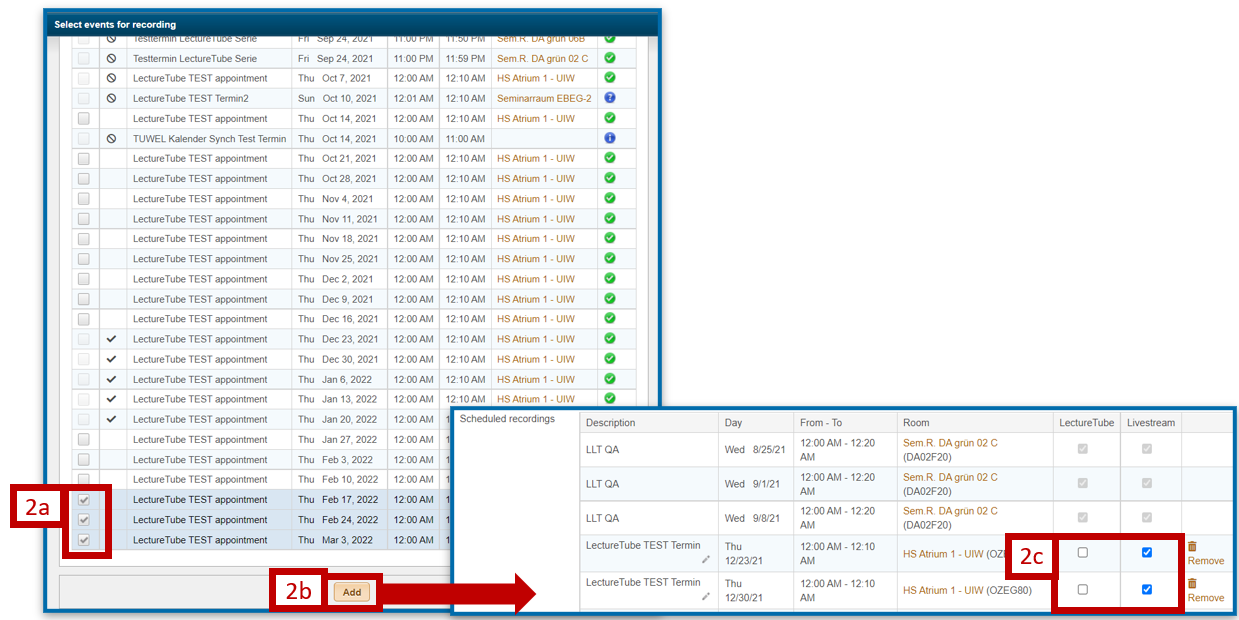
Figure 2: TISS – Add a LectureTube recording
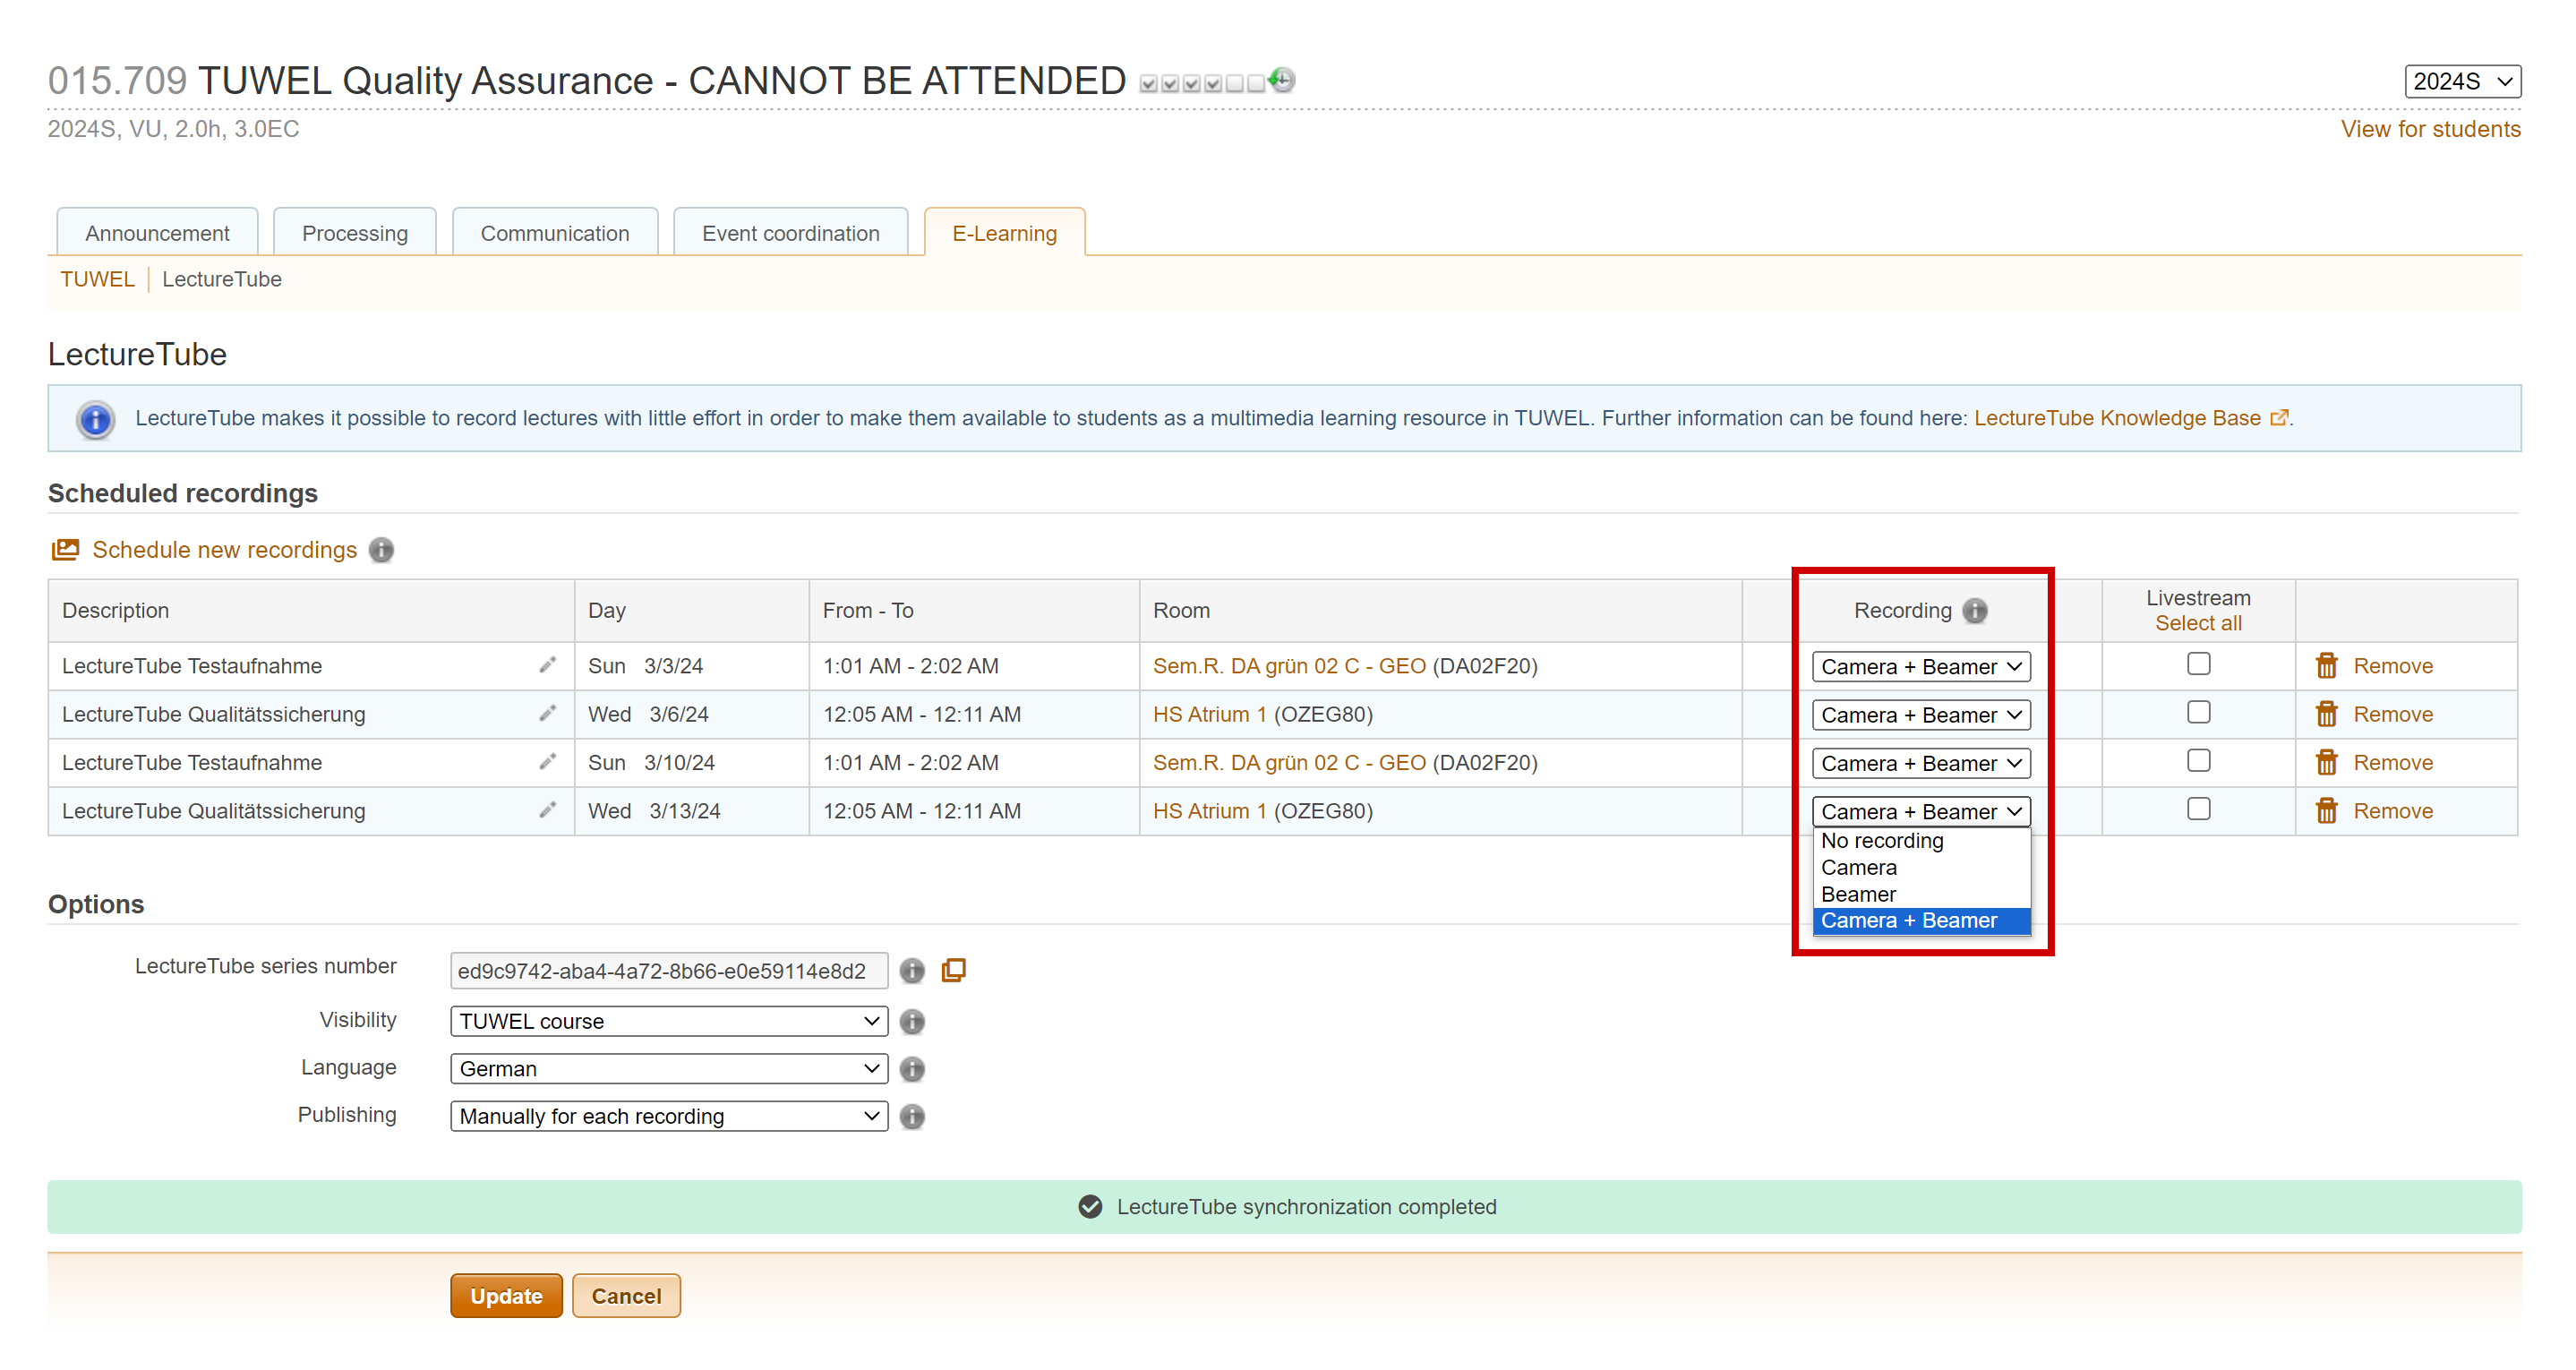
Specify the recording option for each of the appointment dates through the "Recording" column.
The following options are available:
- No recording: No recording is scheduled for this appointment.
- Camera: Only the lecture hall camera will be recorded.
- Beamer: Only the input selected via the touch panel will be recorded.
- Camera + Beamer: Both the lecture hall camera and the selected input will be recorded.
Note: Changing the layout in the lecture hall only affects the live stream, but not the recording. If you are unsure, select the "Camera + Beamer" option to record both streams. In lecture halls with dual recording, individual streams (camera or beamer) can also be removed from the recording afterwards.
Under the "Visibility" option, you can specify the visibility of the recordings. Please note that with the "Not listed" option, the recordings are not visible to anyone. You can also specify under "Publication" whether videos should be checked and published manually or automatically. In the case of an automated publication, the videos with automatically determined cut marks are available to students more quickly and can then be edited afterwards if necessary.
To apply the changes you have made, click on the "Save" button. Your recording dates will then be transferred to the LectureTube system.
Guide in the lecture hall
Note that the touch panel controls may differ in each lecture hall. However, the basic operating sequence is very similar.
The overview of the rooms equipped with LectureTube and the respective GUT data sheet can be accessed in coLAB at https://colab.tuwien.ac.at/x/YQyQ.
Switch on the lecture hall system in the lecture room.
Figure 3: Start the lecture hall system
Switch on the projector.

Figure 4: Switch on the projector
Connect your presenter’s laptop to the relevant port and switch on the required microphones. Test whether you can hear yourself continuously through the loudspeakers in the room.
Note: In some lecture halls, microphones must be borrowed from the porter. Be sure to use lecture hall microphones so that the sound is recorded.
Select the source you are using via the “Input” tab.

Figure 5: Select the input source
The “Stream/Rec” tab shows a preview image with the current layout setting. You can also ensure there that the recording has already started automatically. In newer touch panels, the current status of the recording and the live stream is also displayed at the bottom of the touch panel in each view (Figure 6).
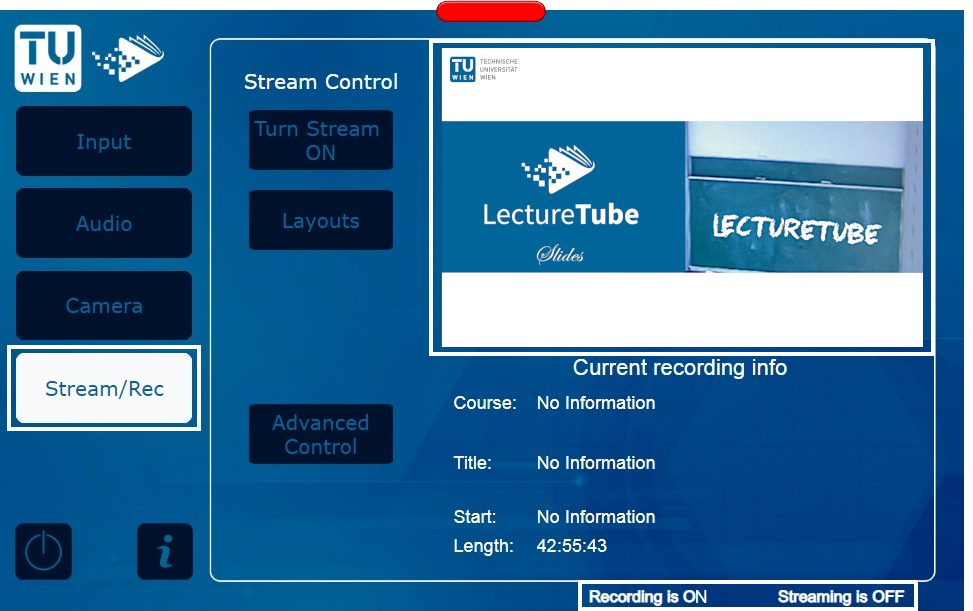
Figure 6: View preview
Check the layout of your recording and change it if necessary, using the “Layouts” button. This allows you to set whether and how the selected input and/or the lecture hall camera are displayed. You can change the selected input (e.g., HDMI, Doc.Cam.) at any time via “Input” in the left menu.
Note: Do not change the layout until the recording has started, because it is reset to a default setting with the automated start of the recording.
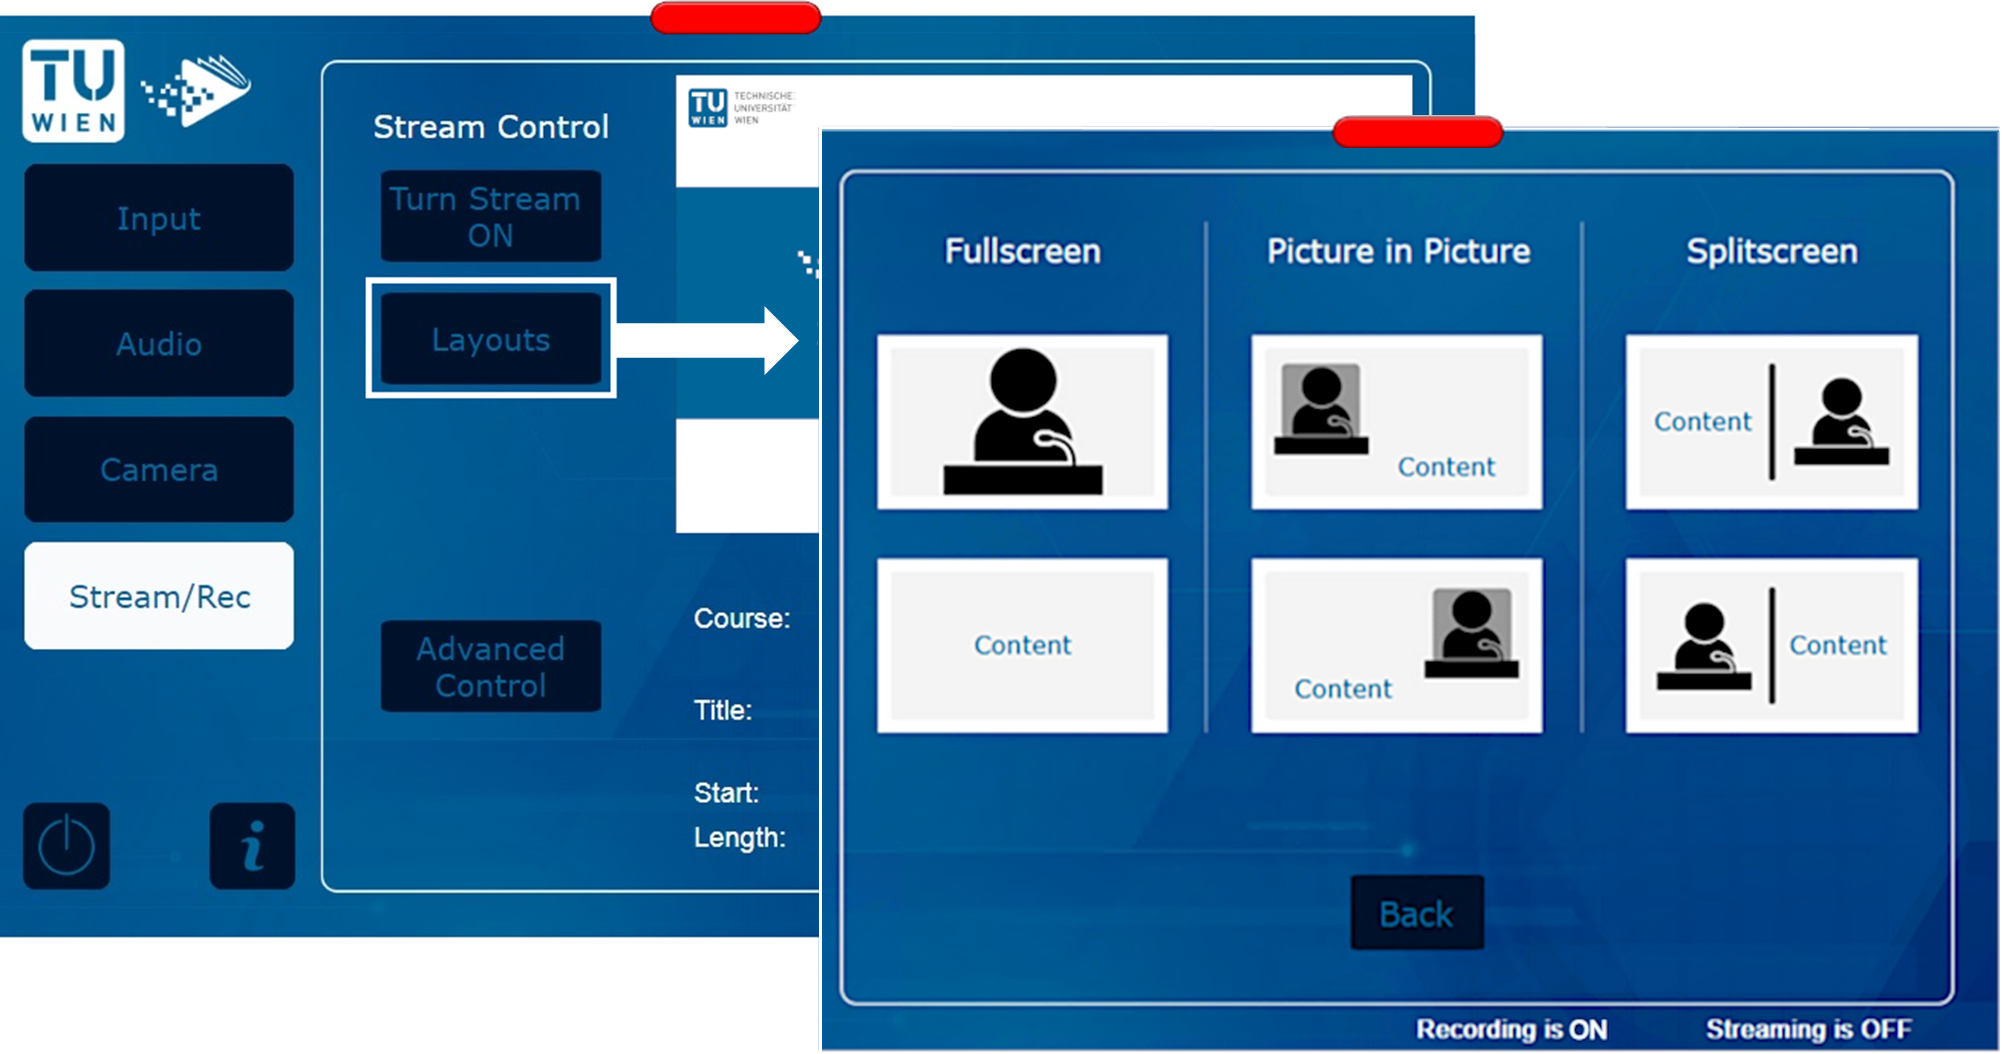
Figure 7: Set the layout after the automatic recording start
Via “Camera” (or in older panels „Streaming Recorder”), you can set the orientation of the lecture hall camera.

Figure 8: Adjust the lecture hall camera
Note: The recording starts and stops automatically. It is not recommended to change the recording via the recording control of the touch panel in the lecture hall!
Note: During pauses, you can switch the microphone off and on again afterwards. Then these passages will be checked and cut out if necessary.
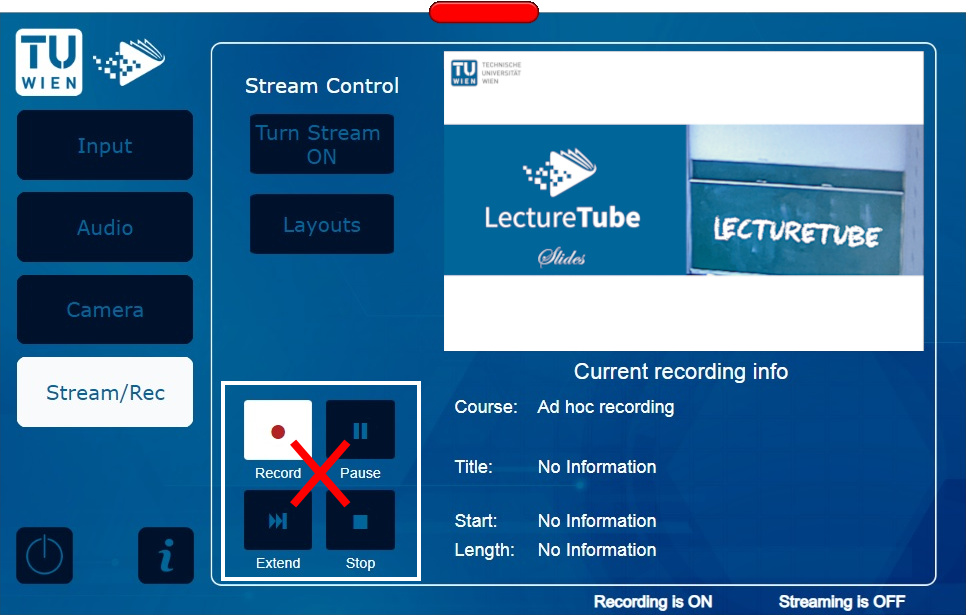
Figure 9: Recording control on the touch panel
Contact
In case of technical problems with the lecture hall system, please contact the central TU Wien support via zslti@tuwien.ac.at or 01 58801 40040.
![]() For questions regarding LectureTube, contact the LectureTube team at support@lecturetube.tuwien.ac.at.
For questions regarding LectureTube, contact the LectureTube team at support@lecturetube.tuwien.ac.at.
