LectureTube Studio
Overview

Record videos via the browser and upload them to LectureTube
Precondition
You need to have a LectureTube series to use the upload function of LectureTube Studio. If you do not have a series for your course, first create one via TISS. To create a series, navigate to the "Course Administration" in TISS and under "Announcement" of the course, click on the tab "E-Learning. In the section "LectureTube", you can create the series for your course and set its visibility.
If there is no TISS page for your event, you can click on the "LectureTube" entry in the left menu of your TUWEL course and create a series there. Be aware that you cannot schedule recordings in the lecture hall for this series yourself.
- You can access the studio via studio.tuwien.ac.at or through the TUWEL course of your lecture.
To open it through TUWEL, click in your course on "More" and "LectureTube" to get to your video overview. Then, use the "Record video" button (Figure 0) to access the LectureTube Studio.
Figure 0: Open the LectureTube Studio - Specify the video sources you want to capture.
For example, select "Display & Camera" to record the screen and the camera image (see Figure 1).
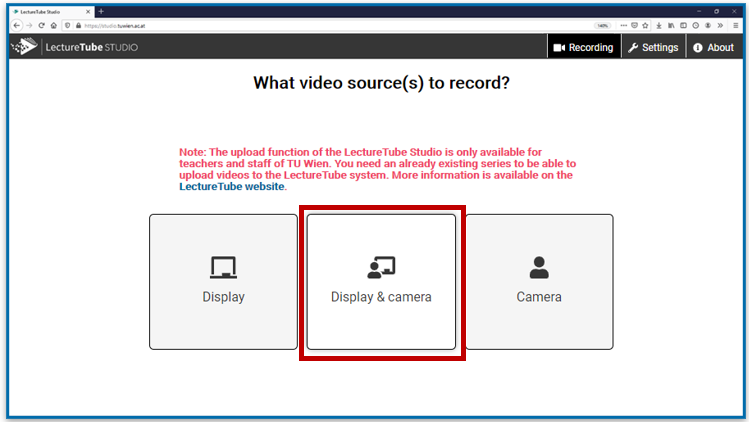
Figure 1: Select video sources - in this example "Display & camera" is selected for recording
- Select your camera (Figure 2) and/or your application window (Figure 3) that should be recorded and allow the studio to access each of them. If you want to record multiple application windows, it is recommended to share the whole screen (depending on the browser, the option is called e.g., "Full screen" or "Entire screen").
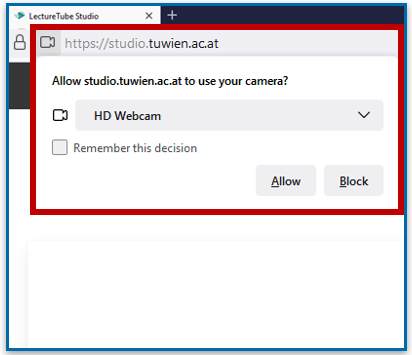
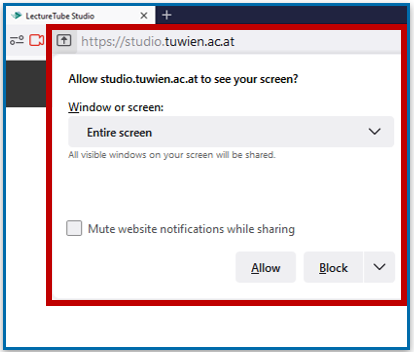
Figure 2: Select your camera Figure 3: Select your screen - If the correct sources are displayed in the preview (4a), click the "Next" (4b) Otherwise, use the "Reselect source(s)" (4c) button to repeat the selection (see Figure 4). If granting access to the sources is not possible, reload the page and then reselect the desired video sources.

Figure 4: Check the selection of the sources
- Select the option "Microphone" if you want to record the audio signal. Otherwise, click on "Without audio" (see Figure 5). If you do not want to record the audio, continue directly with step 8 in these instructions.
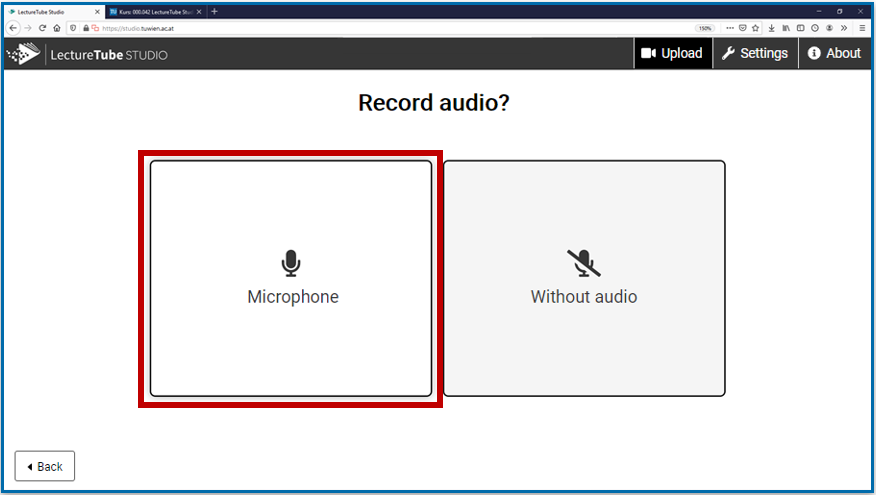
Figure 5: Record audio - in this example "Microphone" is selected to record the audio signal
- If you selected "Microphone" in step 5, select your audio source and grant access to it (see Figure 6).

Figure 6: Select your microphone
- Make sure that the sound level (7a) moves when you speak. If you want to select an alternative microphone, you can make the change in the "Device" (7b) dropdown below the sound level display.
Then, click on the "Next" (7c) button.
Use the "Reselect audio" (7d) button to return to the audio selection in step 5 if needed (see Figure 7).
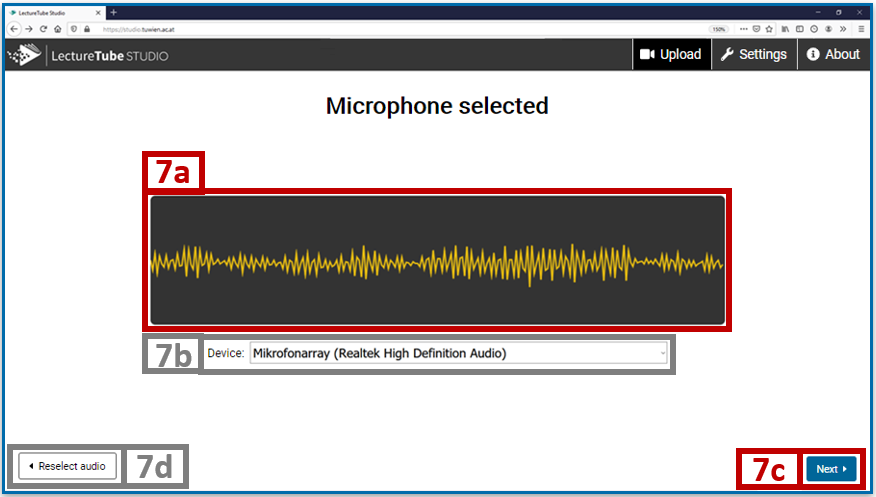
Figure 7: Check your microphone and adjust it if necessary
- Start the recording and give your lecture. If necessary, use the recording controls of LectureTube Studio to pause or resume the recording. When you are finished with your lecture, stop the recording (see Figure 8).
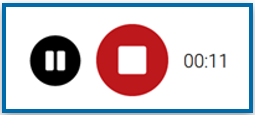
Figure 8: Recording control and display of the duration
Folgende Funktionen stehen zur Verfügung: .. Start recording (available before the recording is started)
 .. Pause recording (available after the recording is started)
 .. Resume recording (available, while the recording is paused)
 .. Stop recording (available after the recording is started)
 - In this overview you can watch the recording by using the play Furthermore, you can select the beginning or the end of your lecture on the timeline and use the two scissor icons to remove (9a) everything before or after the selected passages from the recording. If you are satisfied with the recording, click on the "Next" (9b) button to continue. Otherwise, use the "Discard and record again" (9c) button and repeat the recording until you are satisfied with the result (see Figure 9).
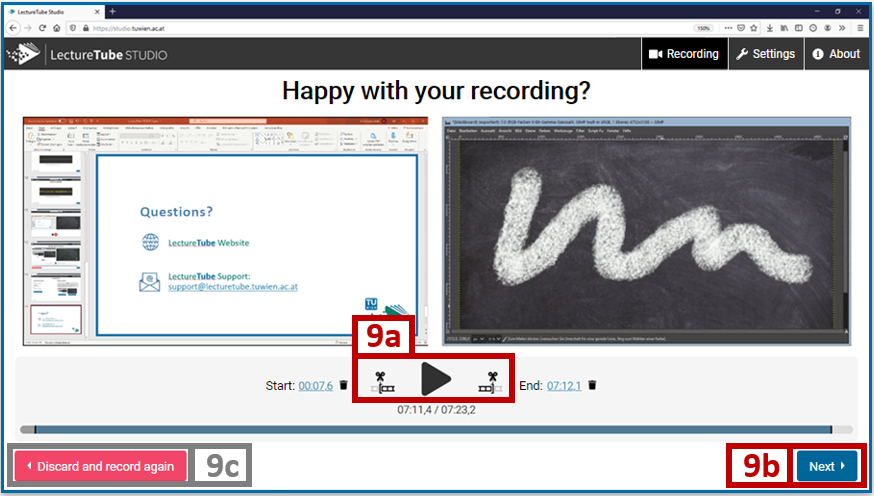
Figure 9: Play and crop the video recorded
- Enter a title for the video and the name of the presenter of the lecture in the input fields. Then, select a series (= your lecture) and click on the button "Upload to LectureTube" (see Figure 10).
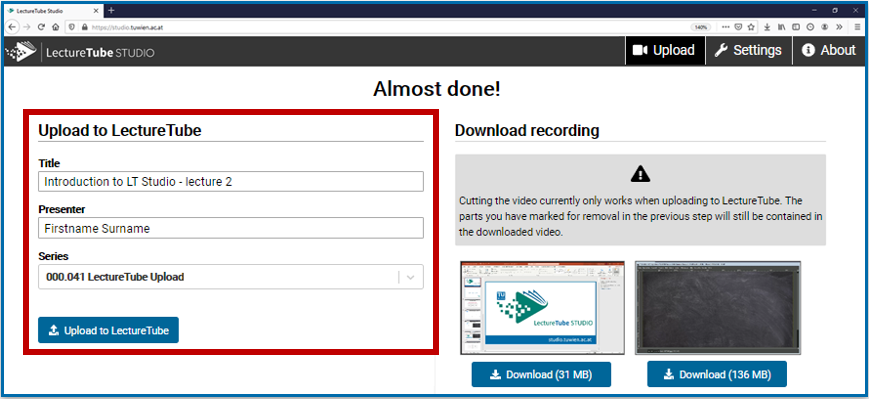
Figure 10: Data input and upload of the video (left) or local download of the video (right)
- As soon as the video is successfully uploaded (see Figure 11), it will be processed by the LectureTube server. After a successful processing of the video, you will receive a confirmation by email. From that moment on, the video is available for you in your LectureTube series.
Figure 11: Video uploaded successfully
- The LectureTube series only needs to be integrated once in TUWEL. All LectureTube videos of this series will then automatically appear in the series as soon as they are successfully processed.
For more information on embedding your videos in TUWEL, please refer to the document "Embedding LectureTube series and episodes in TUWEL".