LectureTube Editor
Overview

prerequisite
Tutors and teachers have different access permissions. In order for tutors to be able to edit videos, teachers must add them to the LectureTube administration interface and grant them “read” and "write" permissions. This is described in the “Visibility” tab.
Edit LectureTube videos via TUWEL
Open the video overview
- Open the TUWEL course of your lecture for which you have activated “LectureTube” through TISS.
- Click on the "More" tab and select the entry “LectureTube” to display the overview page of your videos (Figure 1).

Figure 1: Display the „LectureTube“ video overview
Edit the video with the LectureTube Editor
Click the “Actions menu” gear icon next to the videos you want to edit and select the option “Video editor” (Figure 2).
The LectureTube Editor allows you to trim your videos that are e.g. uploaded or recorded in a lecture hall equipped with LectureTube. Videos that need to be cut with the LectureTube Editor are marked with the scissor icon “Needs cutting”.

Figure 2: Open the video editor through the gear icon
You will be redirected to the LectureTube Editor. With the LectureTube Editor, you can set cutting marks that will be cut out during the processing of the video on the server. To ensure that the video is trimmed to the actual length of the lecture after successful processing, it is recommended that you set cutting marks at the front and back of the video and mark these segments for deletion. Furthermore, you can mark any segments from the middle of the video for deletion. These can be segments in which no content was presented, or which you do not want to publish.
Use the “Cut“ button to set any cuts in the video track. Then, select a segment and click on “Delete” to mark it for deletion. Segments that will be deleted from the processed video are marked in red colour on the timeline. With “Restore“ you can restore a segment that was marked for deletion before. The “Merge Left” or “Merge Right” buttons allow you to remove the cuts again by merging the current segment with the segment on the left or right side of it. If “Preview Mode” is activated, you will be shown a preview, without the segments marked for deletion (= withour the segments marked in red colour on the timeline), while you play the video.

Figure 3: Set and edit cuts in the video
Edit metadata of the video
In the left menu under “Metadata”, you can edit the data of the video, such as the title of the video or the names of the presenters (Figure 4). Note that not all the data listed is visible to the users.

Figure 4: Edit metadata of the video
Select audio and video tracks
In the left-hand menu under "Tracks", you can select the track of the camera or beamer from the video afterwards. You can also select the audio file. Here you can mute or hide the presenter or presentation mode.

Figure 5: select tracks
Generate Subtitles
With this tool, you can edit, delete, and download your generated subtitles.

Figure 6: subtitle menu
If the view does not display the automatically generated subtitles as shown in Figure 6, you also have the option of adding your own subtitles by pressing the + button.

Figure 7: Select a language
After selecting the language, you will be taken to the menu. Here you can upload subtitles or write them yourself at 5-second intervals.

Figure 8: write subtitles on your own
Generate Thumbnail
In the left-hand menu under "Thumbnail" you can generate or upload a preview for the video, which will be displayed as a video teaser in the LectureTube series (Figure 6). To generate a preview image from the video, click on the position in the video timeline from which you would like to take the thumbnail. Then generate it by using the "Generate" button. Alternatively, you can use the "Upload" button to select your own image as a video teaser.

Figure 9: Generate or upload a thumbnail for the video

Figure 10: Generate or upload a thumbnail for the video with the soundtrack
Process video with the changes made
Once you have made the desired changes, click on the "Finish" tab in the left-hand menu of the LectureTube Editor.
With the "Start processing" button, you can process the video with the changes you have made (Figure 7).
If you want to save your changes in order to continue editing the video at a later time, click on the "Save changes" button. If, on the other hand, you would like to discard the changes you have made, click on the "Discard changes" button.
If you want to save your changes to continue editing the video at a later time, click on the "Save changes" button. If, on the other hand, you would like to discard the changes you have made, click on the "Discard changes" button.
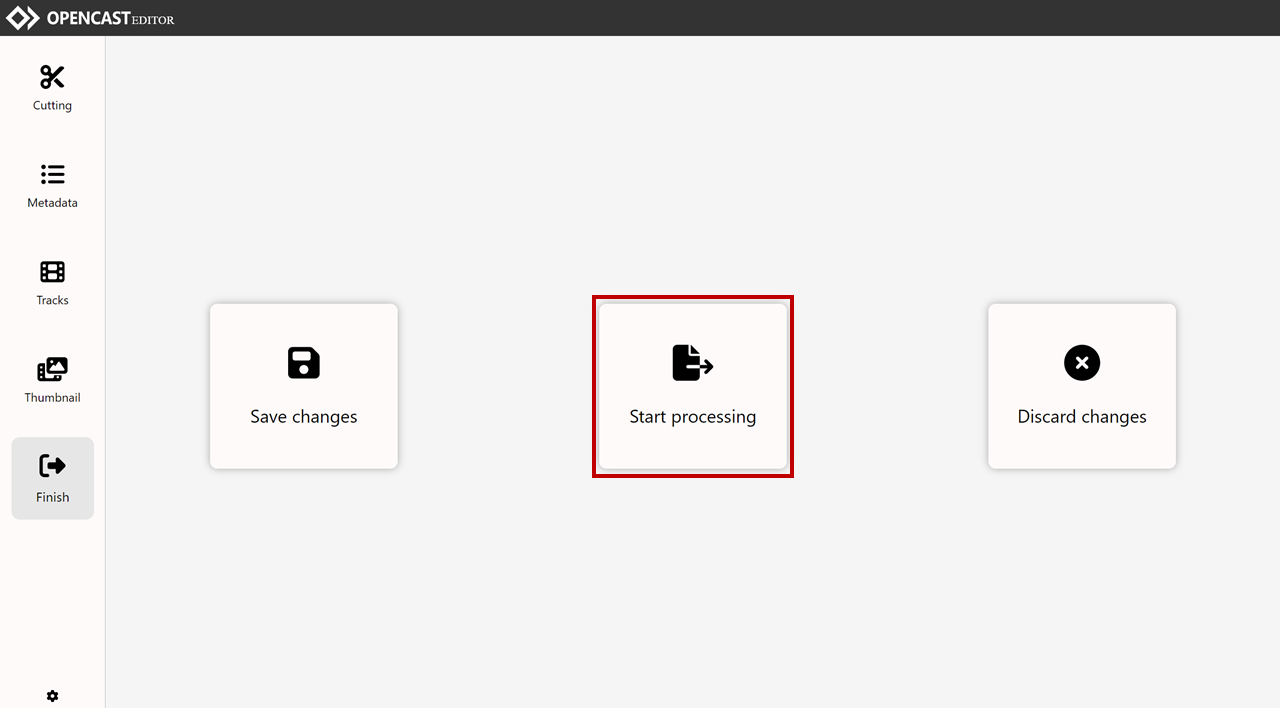
Figure 11: Process the video with the changes made
Confirm your selection again using the "Start processing" button (Figure 8).
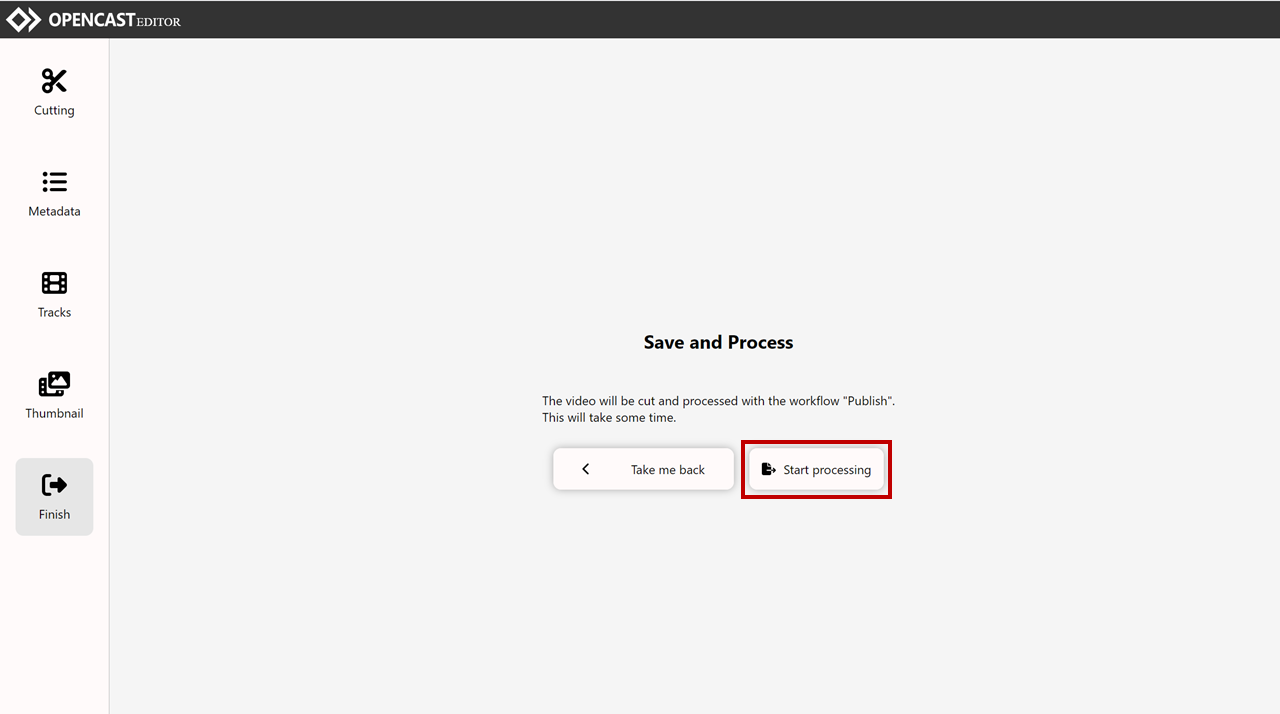
Figure 12: Confirm the video processing
Once the changes have been successfully saved, a success message is displayed (Figure 9).
The video is then automatically processed. In the meantime, you can already close the page.
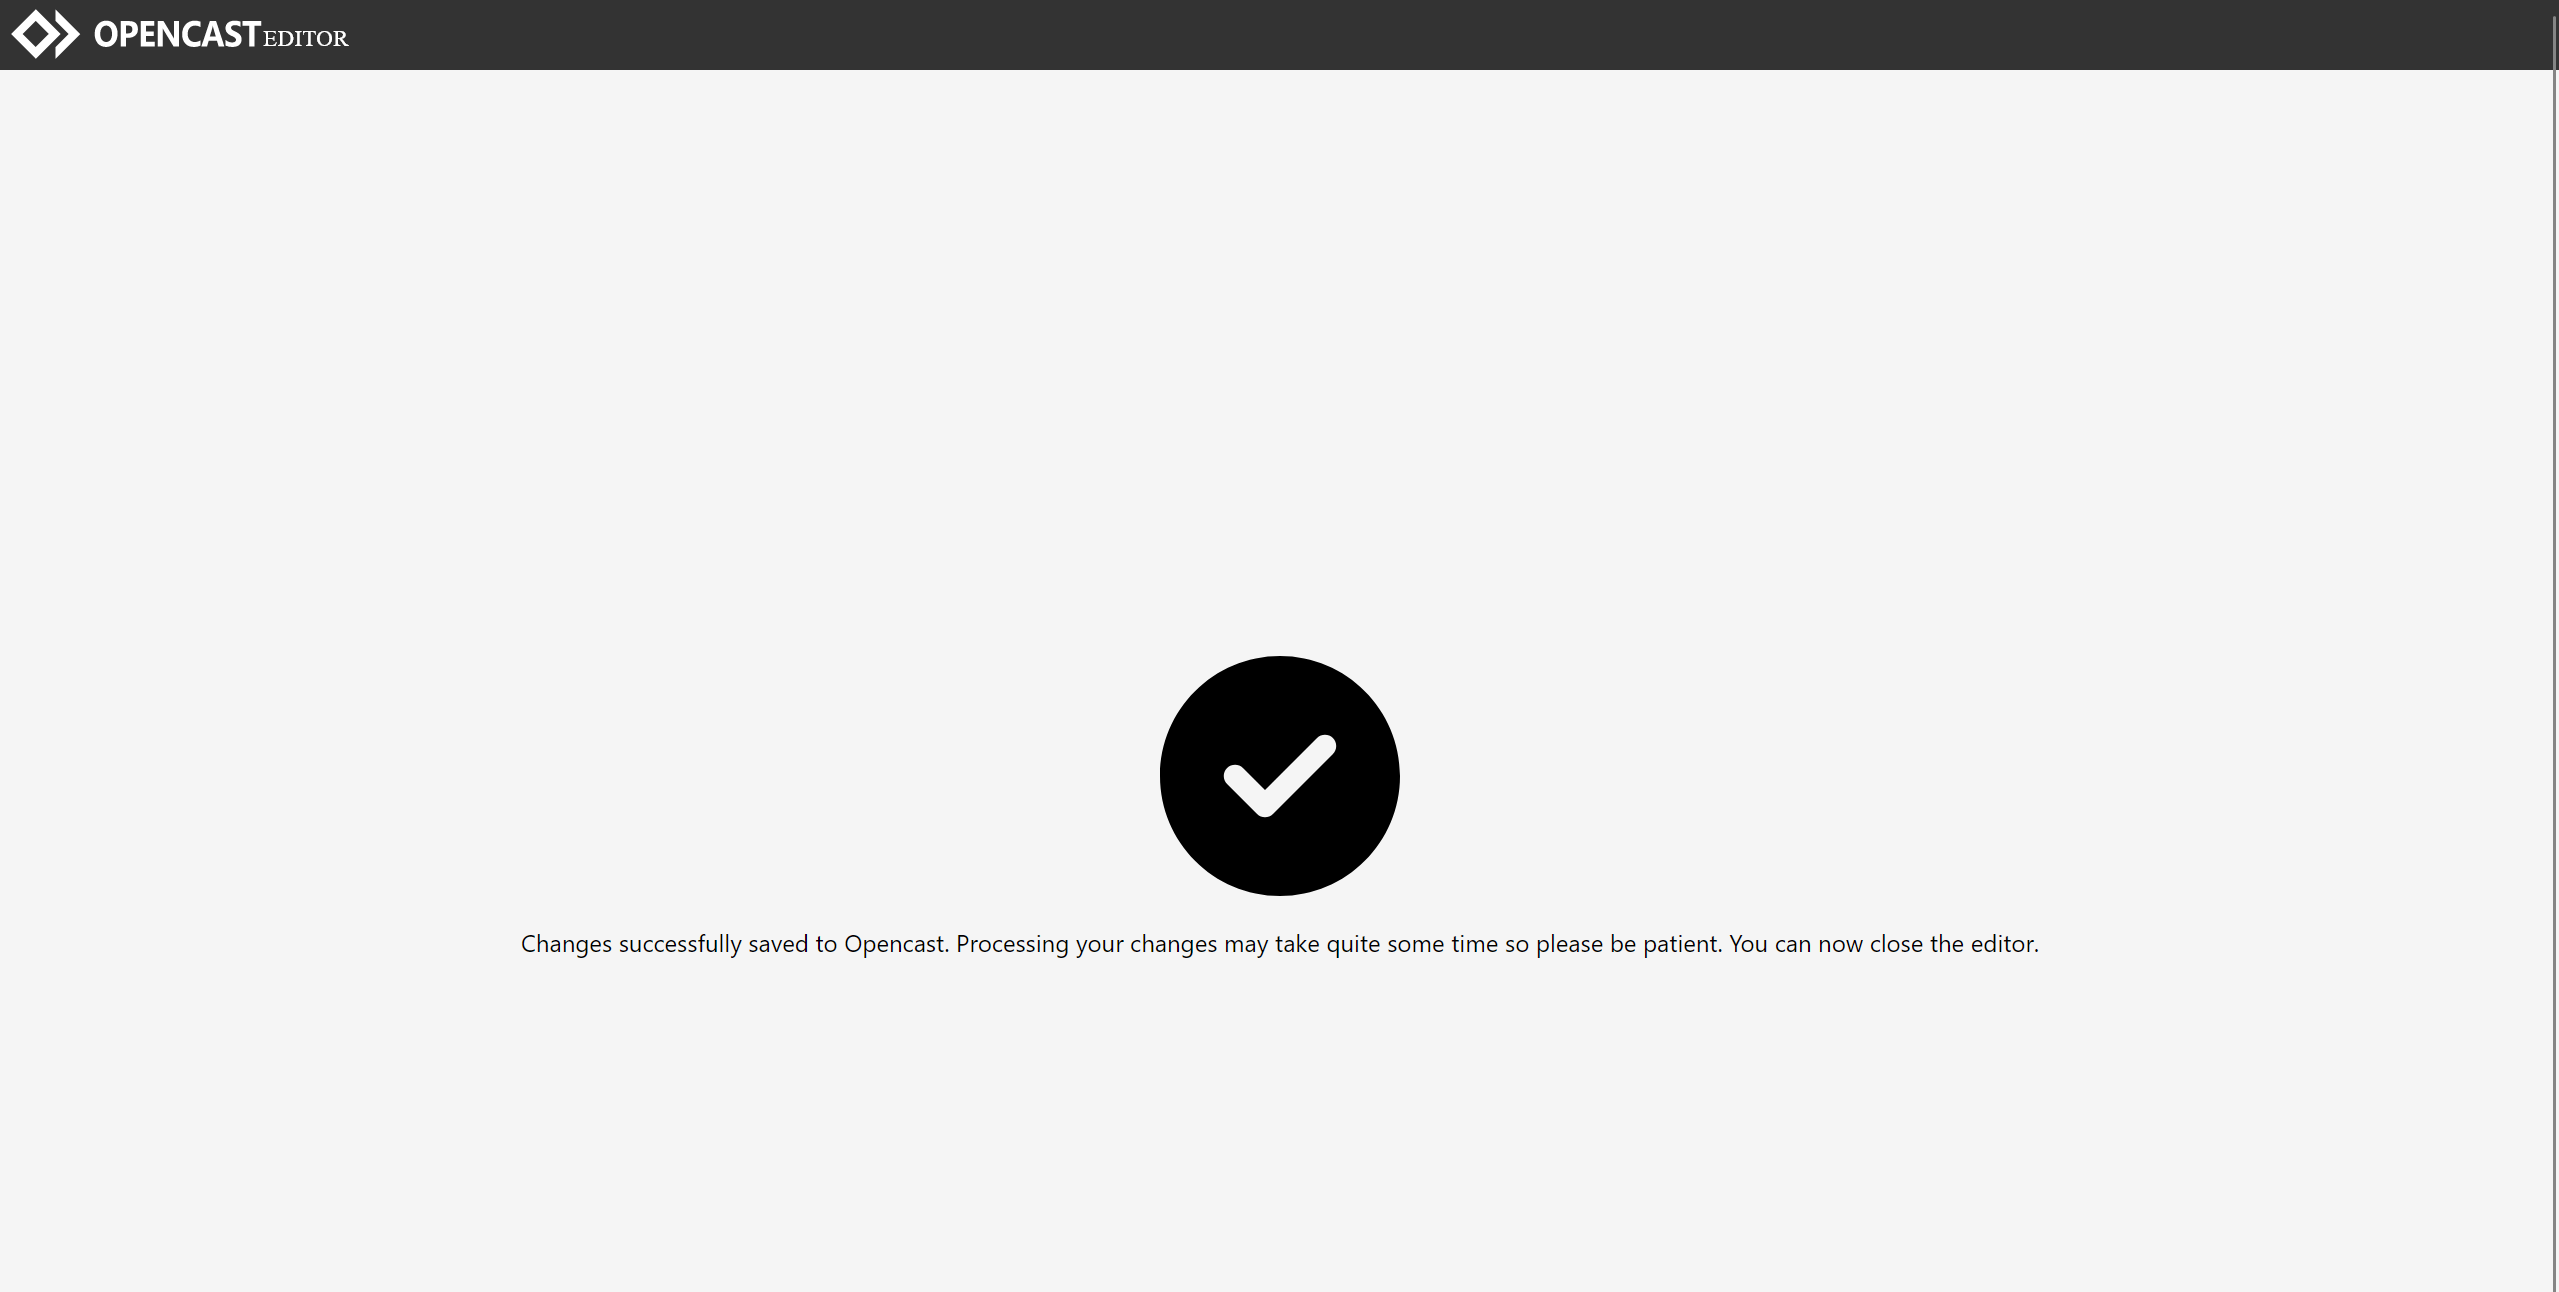
Figure 13: Changes successfully saved. The video is now being processed
Once the video has been successfully processed, it will be published according to the visibility of the series and will be available for you in your LectureTube series. You only need to integrate your series once, e.g. in your TUWEL course, to make the videos available (Figure 10).
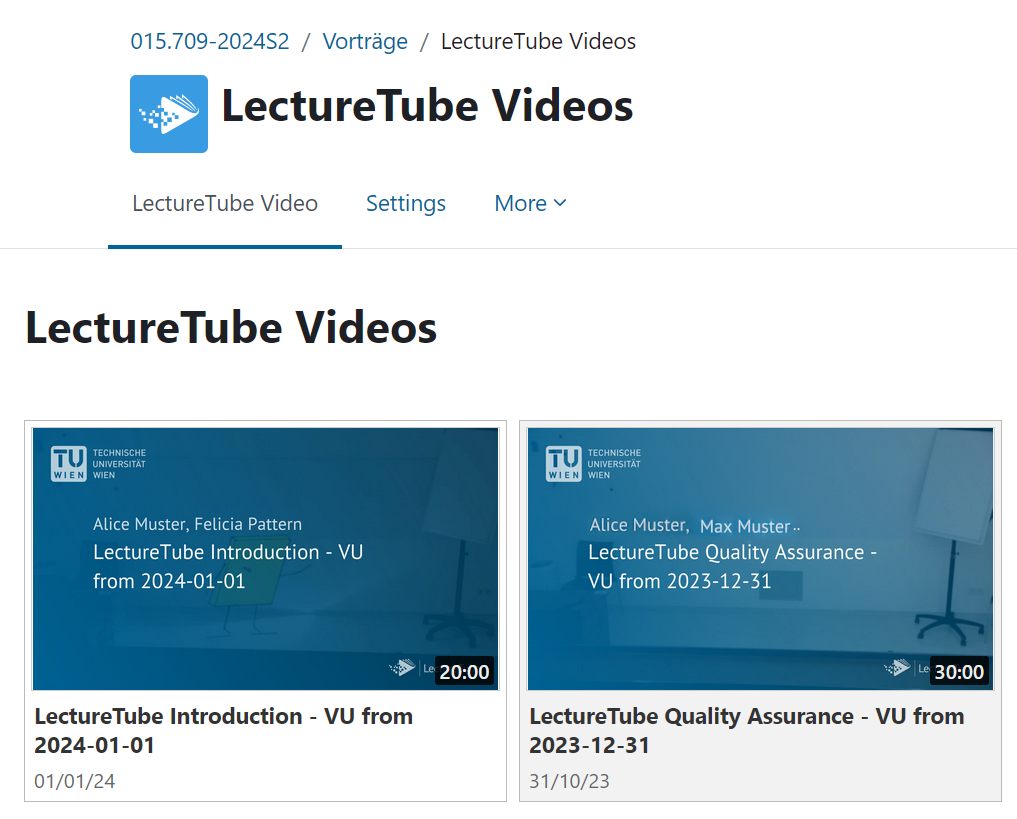
Figure 14: Series integrated in TUWEL
You can integrate both individual videos and the entire series, e.g. in your TUWEL course.
When required, you can adjust the visibility setting of the series via TISS.
You can view the current status of your videos in the video overview in TUWEL.
Further instructions on LectureTube can be found in the LectureTube Knowledge Base.
If you encounter technical problems with the lecture hall equipment, please contact the central TU Wien Support for Teaching via zslti@tuwien.ac.at or 01 58801 40040.
![]() If you have any questions about LectureTube, please contact the LectureTube team at support@lecturetube.tuwien.ac.at.
If you have any questions about LectureTube, please contact the LectureTube team at support@lecturetube.tuwien.ac.at.
